How to create a playful letter animation
Ihave been working on a word game recently, and I wanted to have nice playful animations to make the UI more fun. I decided to improvise, and the result turned out well. In this post, I will explain how you can create this effect and engage your users.
A journey of a great animation begins with a single letter. Or something. Let’s start our journey by designing a letter tile.
struct SingleLetter: View {
    let letter: Character
    let backgroundColor: Color
    let letterColor: Color

    var body: some View {
        Text(String(letter))
            .foregroundColor(letterColor)
            .font(.title3)
            .fontWeight(.heavy)
            .frame(width: 44, height: 44)
            .background(backgroundColor)
    }
}


struct SingleLetter_Previews: PreviewProvider {
    static var previews: some View {
        SingleLetter(letter: "W",
                     backgroundColor: .brown,
                     letterColor: .white)
    }
}
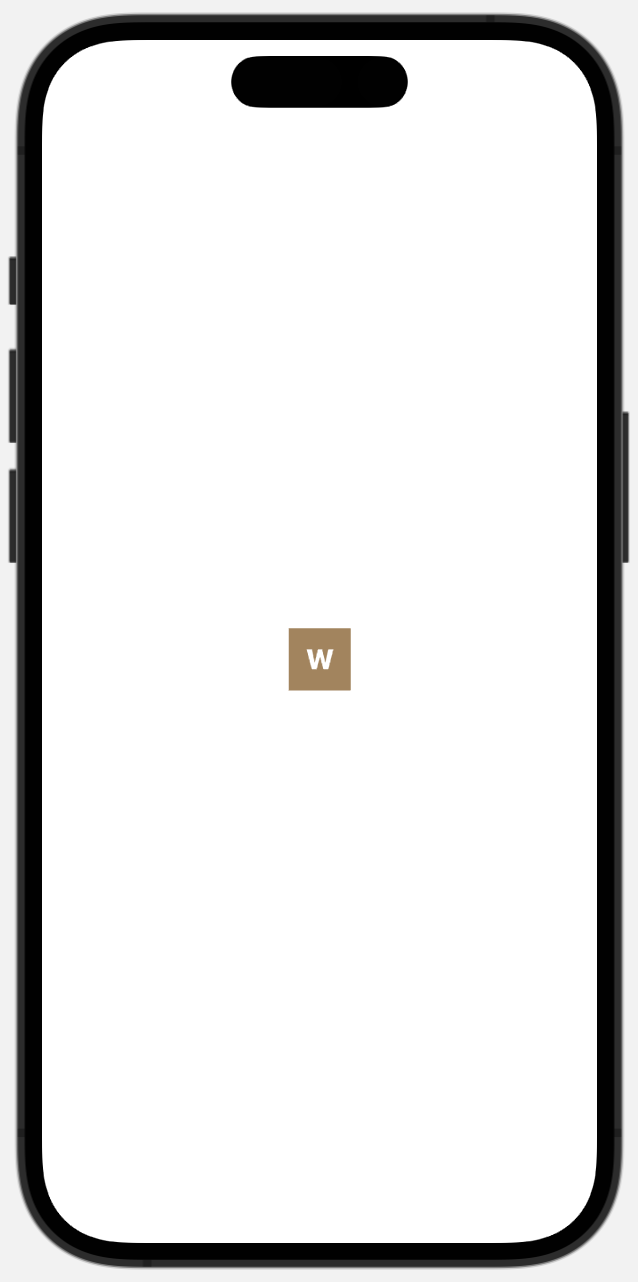
This is good enough for now. Using previews enables us to quickly test different colours and font sizes and land on an excellent combination. Expanding the preview will help us see the letter in context. That way, we can inform the code we will write next.
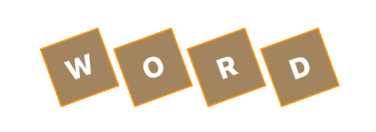
struct SingleLetter_Previews: PreviewProvider {
    static var previews: some View {
        HStack {
            SingleLetter(letter: "W",
                         backgroundColor: .brown,
                         letterColor: .white)
            .border(.orange)
            SingleLetter(letter: "O",
                         backgroundColor: .brown,
                         letterColor: .white)
            .border(.orange)
            SingleLetter(letter: "R",
                         backgroundColor: .brown,
                         letterColor: .white)
            .border(.orange)
            SingleLetter(letter: "D",
                         backgroundColor: .brown,
                         letterColor: .white)
            .border(.orange)
        }
    }
}
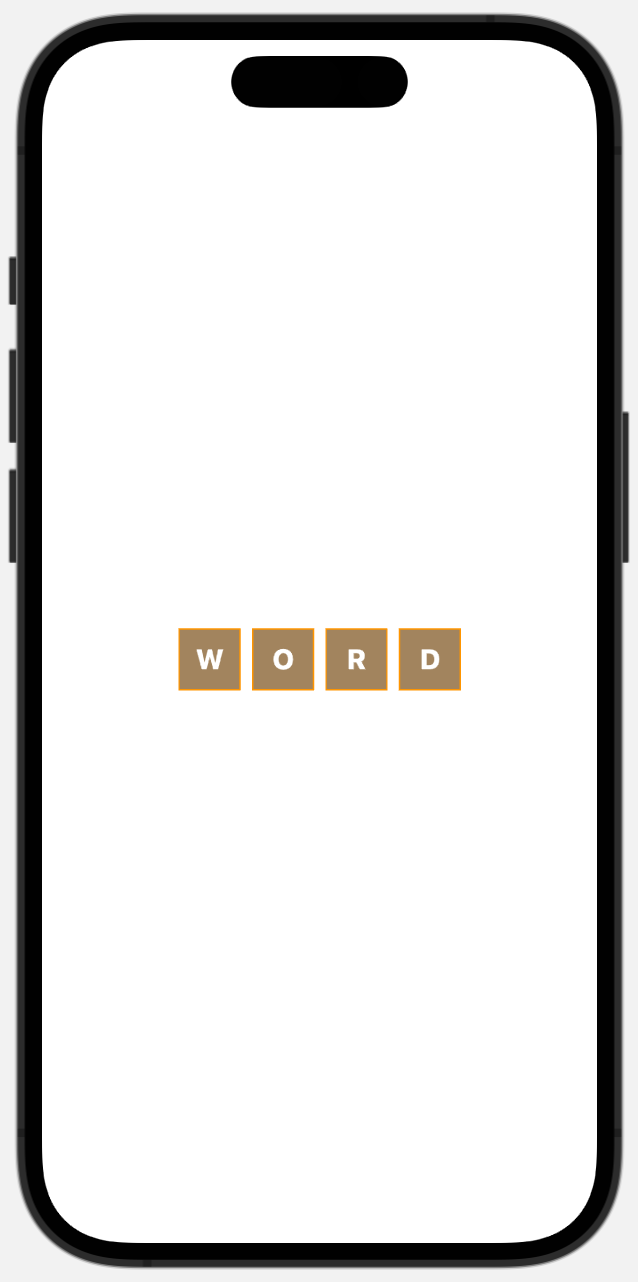
My instinct tells me to move the border definitions into the SingleLetter struct. I will hold off for now as I want to animate the borders later, and I am still determining where I can do that better.
Next, let’s create our word view, constructed by combining a bunch of letters. We already have the code in the preview above, so all we have to do is copy it to a new view.
struct SingleWord: View {
    var body: some View {
        HStack {
            SingleLetter(letter: "W",
                         backgroundColor: .brown,
                         letterColor: .white)
            .border(.orange)
            SingleLetter(letter: "O",
                         backgroundColor: .brown,
                         letterColor: .white)
            .border(.orange)
            SingleLetter(letter: "R",
                         backgroundColor: .brown,
                         letterColor: .white)
            .border(.orange)
            SingleLetter(letter: "D",
                         backgroundColor: .brown,
                         letterColor: .white)
            .border(.orange)
        }
    }
}

struct SingleWord_Previews: PreviewProvider {
    static var previews: some View {
        SingleWord()
    }
}
We already saw the result in the preview of the previous view, so let’s keep going. Next, let’s parametrise a little. We need to inject the word we want to show instead of hardcoding it.
struct SingleWord: View {
    let letters: [Character]

    init(word: String) {
        self.letters = Array(word)
    }

    var body: some View {
        HStack {
            ForEach(letters, id: \.self) { letter in
                SingleLetter(letter: letter,
                             backgroundColor: .brown,
                             letterColor: .white)
                .border(.orange)
            }
        }
    }
}

struct SingleWord_Previews: PreviewProvider {
    static var previews: some View {
        SingleWord(word: "WORD")
    }
}
Again, the preview is the same.
And we finally arrived at the interesting part. Let’s shake these letters! We can start by rotating them left and right continuously. Some trial and error help us determine the angle that will best serve our needs. Here you can see what happens when we try .rotationEffect(Angle(degrees: -20)) and .rotationEffect(Angle(degrees: +20))

To animate the angle, we need to make a few changes. We need a state var to hold a value that can be animated. We will use a boolean in this case. We also need to use the powerful .animation view modifier. There are many animation settings you can play with. For our purposes, a simple .linear animation will suffice, with a duration of 1 second. We will set it to repeat forever and autoreverse as we don’t want the letters to suddenly twitch. Let’s see the code.
struct SingleWord: View {
    @State private var isAnimating = false
    private let letters: [Character]

    init(word: String) {
        self.letters = Array(word)
    }

    var body: some View {
        HStack {
            ForEach(letters, id: \.self) { letter in
                SingleLetter(letter: letter,
                             backgroundColor: .brown,
                             letterColor: .white)
                .border(.orange)
                .rotationEffect(Angle(degrees: isAnimating ? -20 : 20))
                .animation(.linear(duration: 1).repeatForever(autoreverses: true), value: isAnimating)
            }
        }
        .onAppear {
            isAnimating = true
        }
    }
}

They are moving! Job done? No. I don’t know about you, but to me, that looks more like marching than dancing. It is too perfect and uniform. We can alternate rotating letters - while the first rotates from -20 to 20 degrees, the second rotates from 20 to -20 degrees, and so on. In addition, we will introduce explicit spacing for the HStack as we need the letters to be further apart and not overlap when they “dance”.
    var body: some View {
        HStack(spacing: 20) {
            ForEach(letters.indices, id: \.self) { index in
                let letter = letters[index]
                SingleLetter(letter: letter,
                             backgroundColor: .brown,
                             letterColor: .white)
                .border(.orange)
                .rotationEffect(Angle(degrees: isAnimating ? angles(for: index).from : angles(for: index).to))
                .animation(.linear(duration: 1).repeatForever(autoreverses: true), value: isAnimating)
            }
        }
        .onAppear {
            isAnimating = true
        }
    }

    private func angles(for index: Int) -> (from: Double, to: Double) {
        index.isMultiple(of: 2) ? (from: -20, to: 20) : (from: 20, to: -20)
    }

To make the movements even less perfect we can introduce randomness. Instead of returning -20 or 20, the angles method can return something like Double.random(in: 18...22), for example.
So far, we have managed to produce rotating letters. Our target is dancing letters so let’s keep going. The other two attributes we can animate are scale and border width. Changing the scale of the letters will introduce a pulsating effect, which, combined with a border thickness, will have the desired result. We want all these animations to happen in unison. That’s why we will use the same isAnimating variable to control all of them. Let’s start with scale. We don’t want the letters to get too big or too tiny, so the scale factor shouldn’t change more than 10-20%. You can play with it and see what values work for you. For my needs, 0.85 - 1.15 works best. Once again, feel free to add randomness for even better results.
    var body: some View {
        HStack(spacing: 20) {
            ForEach(letters.indices, id: \.self) { index in
                let letter = letters[index]
                SingleLetter(letter: letter,
                             backgroundColor: .brown,
                             letterColor: .white)
                .border(.orange)
                .rotationEffect(Angle(degrees: isAnimating ? angles(for: index).from : angles(for: index).to))
                .scaleEffect(isAnimating ? scale(for: index).from : scale(for: index).to)
                .animation(.linear(duration: 1).repeatForever(autoreverses: true), value: isAnimating)
            }
        }
        .onAppear {
            isAnimating = true
        }
    }

    private func angles(for index: Int) -> (from: Double, to: Double) {
        index.isMultiple(of: 2) ? (from: -20, to: 20) : (from: 20, to: -20)
    }

    private func scale(for index: Int) -> (from: Double, to: Double) {
        index.isMultiple(of: 2) ? (from: 0.85, to: 1.15) : (from: 1.15, to: 0.85)
    }

We are almost there. Next, let’s animate our borders too, and introduce that randomness I keep mentioning. Also, let’s change the preview background and see how our letters perform on a darker stage.
struct SingleWord: View {
@State private var isAnimating = false
private let letters: [Character]
init(word: String) {
self.letters = Array(word)
}
var body: some View {
HStack(spacing: 20) {
ForEach(letters.indices, id: \.self) { index in
let letter = letters[index]
SingleLetter(letter: letter,
backgroundColor: .brown,
letterColor: .white)
.border(.orange, width: isAnimating ? 5 : 0)
.rotationEffect(Angle(degrees: isAnimating ? angles(for: index).from : angles(for: index).to))
.scaleEffect(isAnimating ? scale(for: index).from : scale(for: index).to)
.animation(.linear(duration: 1).repeatForever(autoreverses: true), value: isAnimating)
}
}
.onAppear {
isAnimating = true
}
}
private func angles(for index: Int) -> (from: Double, to: Double) {
let firstAngle = Double.random(in: -22 ... -18)
let secondAngle = Double.random(in: 18 ... 22)
return index.isMultiple(of: 2) ? (from: firstAngle, to: secondAngle) : (from: secondAngle, to: firstAngle)
}
private func scale(for index: Int) -> (from: Double, to: Double) {
let firstScale = Double.random(in: 0.85 ... 0.9)
let secondScale = Double.random(in: 1.1 ... 1.15)
return index.isMultiple(of: 2) ? (from: firstScale, to: secondScale) : (from: secondScale, to: firstScale)
}
}
struct SingleWord_Previews: PreviewProvider {
static var previews: some View {
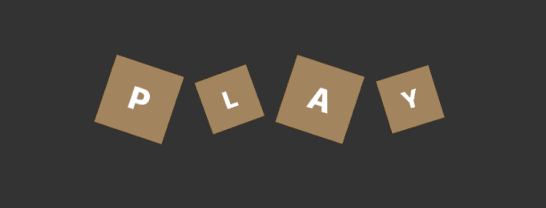
ZStack {
Color.black.opacity(0.8).ignoresSafeArea()
SingleWord(word: "PLAY")
}
}
}

In summary, we created a cool dancing effect that can delight our users. We didn’t even have to build and run the app; we saw all the action in the live previews. Where to go from here? You can add more animations to your views. Another easily animatable property is the offset. I didn’t include it here as it would have been a bit too much animating all at once. Another thing you can do is extract the rest of the hardcoded values, such as the frame size, the spacing, and the border width, and play with them. Let me know what you manage to achieve.
You can download the code for this post from https://github.com/dchakarov/letter-play.