Drop Pin in SwiftUI
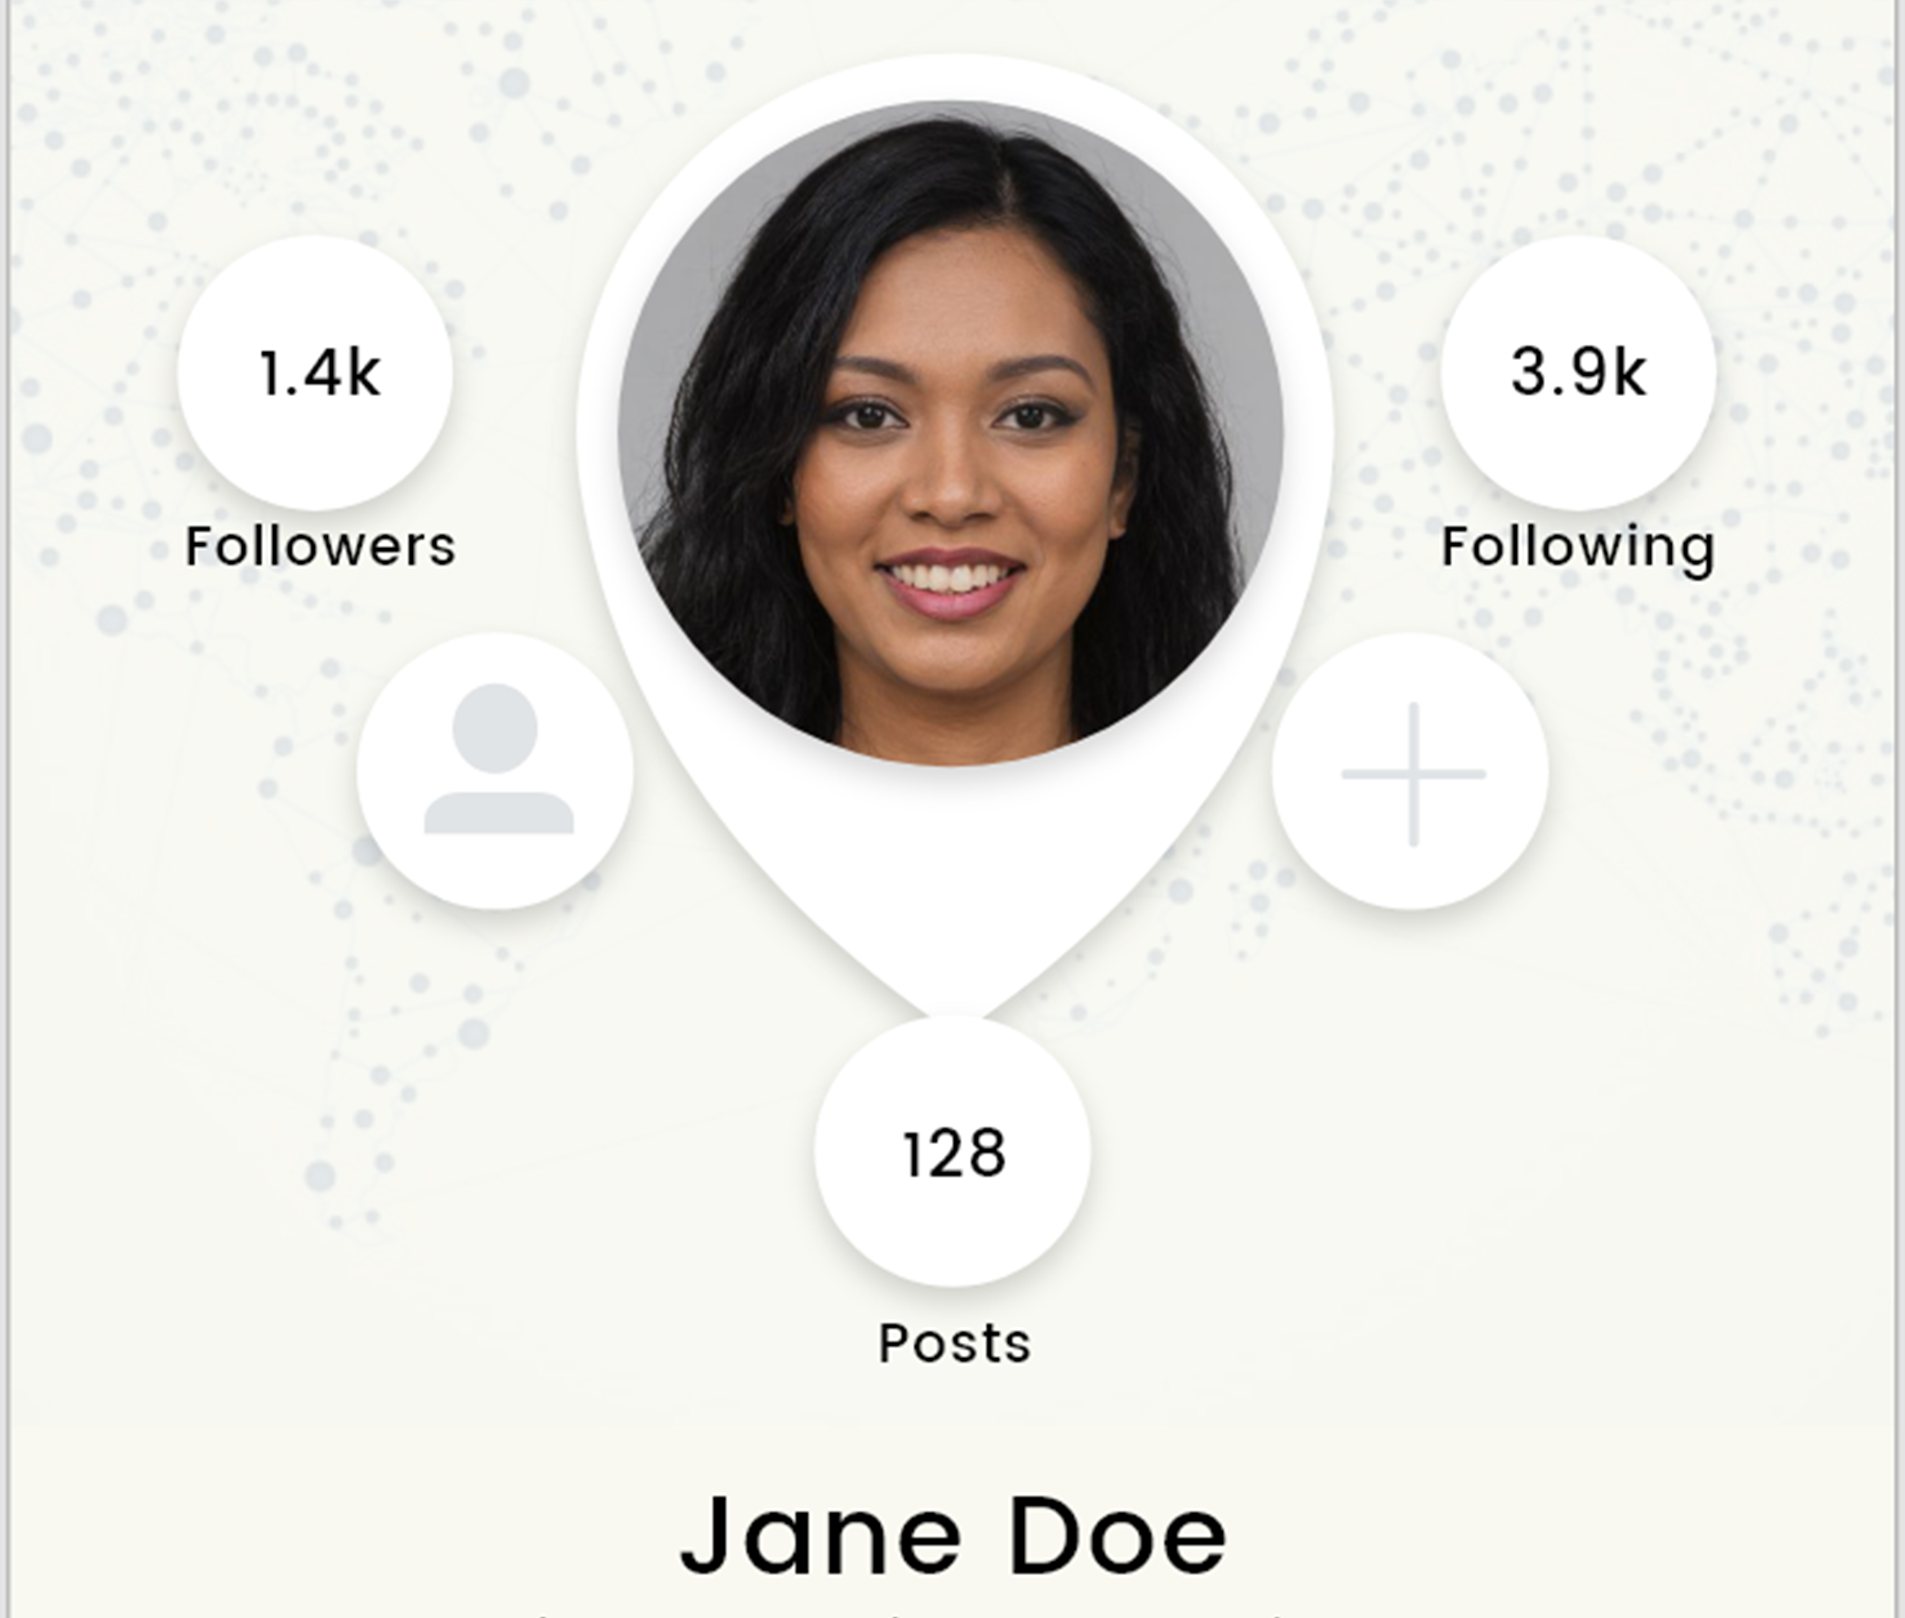
When my friend Steli asked me to help her to translate her design into SwiftUI I thought it would be a piece of cake. It’s just a bunch of circles, some text, and a custom shape in the middle.
The custom shape looked like one of those pins you see in the map apps. My first thought was to try and search for a ready to use code that generates that shape. That produced no results. Maybe it was my choice of search words, maybe SwiftUI was too new, maybe nobody was using shapes. Anyway, I reached to the conclusion that I had to create it myself.
I didn’t have any experience with drawing shapes, or using paths. By the look of it, I thought, it would be just drawing a triangle and put half a circle on top of it. I did just that, and the result was not pretty.
struct DropPin: Shape {
  var startAngle: Angle = .degrees(180)
  var endAngle: Angle = .degrees(0)

  func path(in rect: CGRect) -> Path {
    var path = Path()
    path.move(to: CGPoint(x: rect.midX, y: rect.maxY))
    path.addLine(to: CGPoint(x: rect.minX, y: rect.midY))
    path.addArc(center: CGPoint(x: rect.midX, y: rect.midY), radius: rect.width / 2, startAngle: startAngle, endAngle: endAngle, clockwise: false)
    path.addLine(to: CGPoint(x: rect.midX, y: rect.maxY))
    return path
  }
}

I read some more about paths and arcs, and after a few more iterations I managed to achieve what I wanted.
struct DropPin: Shape {
  var startAngle: Angle = .degrees(180)
  var endAngle: Angle = .degrees(0)

  func path(in rect: CGRect) -> Path {
    var path = Path()
    path.move(to: CGPoint(x: rect.midX, y: rect.maxY))
    path.addCurve(to: CGPoint(x: rect.minX, y: rect.midY),
                              control1: CGPoint(x: rect.midX, y: rect.maxY),
                              control2: CGPoint(x: rect.minX, y: rect.midY + rect.height / 4))
    path.addArc(center: CGPoint(x: rect.midX, y: rect.midY), radius: rect.width / 2, startAngle: startAngle, endAngle: endAngle, clockwise: false)
    path.addCurve(to: CGPoint(x: rect.midX, y: rect.maxY),
                              control1: CGPoint(x: rect.maxX, y: rect.midY + rect.height / 4),
                              control2: CGPoint(x: rect.midX, y: rect.maxY))
    return path
  }
}

My friend was happy with my work, and we lived happily ever after. The end.
Well, not exactly. She decided to not use it after all, as she had a better idea for that screen. So I decided, with her permission, to share it on GitHub for anyone that might need to draw something similar. Feel free to use it however you want.